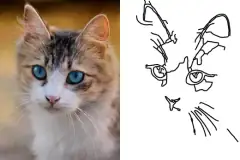
A toy sewn from a child’s own drawing is the gift they recognize across the room. Shops make them from a mailed drawing for a lot of money and weeks of waiting; at home, the hard part is the pattern: enlarging the drawing, simplifying its outline into a shape that can be sewn, adding a seam allowance and mirroring the back. This page does those steps from a phone photo.
What the pattern has
| On the sheet | What it is for |
|---|---|
| Solid line | cut the fabric here |
| Dashed line | sew here, with the two pieces right sides together |
| Two ticks on the dashed line | leave the seam open between them, to turn the toy and stuff it |
| The drawing inside the front | printed in color on printable fabric, or pale as a guide to trace or stitch |
| BACK | the same shape mirrored, so the two pieces meet once they face each other |
Choose the toy’s height from 6 to 16 inches and a seam allowance of 1/4, 3/8 or 1/2 inch. The pattern prints at full size; a toy too big for one sheet is split across sheets with corner marks to tape them edge to edge.
Sewing it
- Cut out the paper pieces along the solid line and pin each to its fabric. Felt, fleece and minky do not fray.
- Sew on the dashed line with the right sides together, about 2 mm stitches, and stop at the ticks.
- Clip into the curves of the seam allowance, close to the stitching but not through it, so the shape turns smoothly.
- Turn it right side out through the opening and push the corners out with a chopstick.
- Stuff it with polyester fiberfill, the far ends first, and close the opening with a ladder stitch.
What it costs
Nothing. No account, no watermark, no limit. The photo of the drawing never leaves your device.
The same drawing can also become a Christmas card, stickers or ornaments, and the photo gifts shelf has more gifts to make at home.
Questions
How do I make a stuffed animal from my child's drawing?
Photograph the drawing, choose the toy's height and print the pattern. Cut out the paper pieces, pin them to two layers of fabric and cut along the solid line. Lay the two fabric pieces right sides together, sew on the dashed line and leave the seam open between the two ticks. Clip into the curves, turn it right side out, stuff it and close the opening by hand.
How do I keep the drawing's colors on the toy?
Choose The drawing in color and print the front piece on printable fabric for inkjet printers, then set the ink as the fabric's instructions say before you sew. For felt or fleece, choose The drawing as a light guide: the drawing prints pale inside the front piece, to trace with a fabric marker or to stitch over.
Why does the pattern look simpler than the drawing?
A sewing machine cannot follow a thin arm or turn into a narrow gap, and a part thinner than a finger cannot be turned right side out and stuffed. The page fills narrow gaps and leaves off thin parts, so the shape can be sewn. Rounder, easier to sew smooths more; Close to the drawing smooths less. A name or a sun drawn apart from the figure is left off; it can be sewn on as a patch.
What fabric and stuffing should I use?
Felt, fleece and minky are forgiving and do not fray; quilting cotton works with the 3/8 in allowance. Stuff with polyester fiberfill, a little at a time, pushing it into the ends first. For a child under three, leave off buttons and beads and embroider the details instead.
Is the photo uploaded?
No. The drawing is lifted off the paper and the pattern is drawn in your browser. Closing the tab erases it.