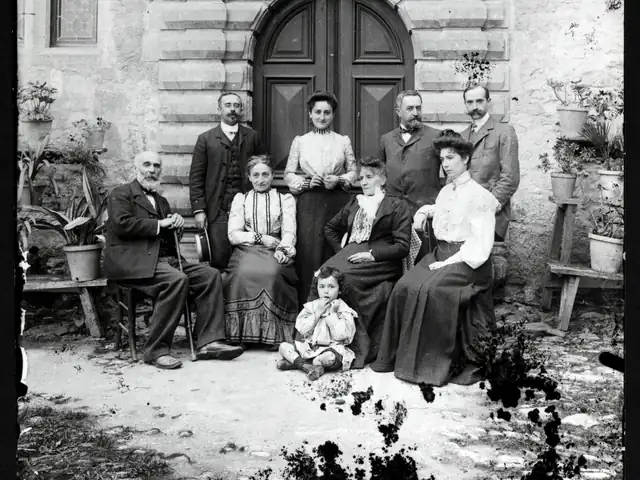
A shoebox of old photos holds two kinds of problem: pictures trapped on negatives or slides, and prints that have faded, scratched or torn. Both can be fixed at home, in a browser, by tools that measure what went wrong and slide it back — no AI generating guesses, and no upload of the only copy that exists.
What does restoring an old photo actually involve?
| Step | What it fixes | The tool | What it honestly cannot do |
|---|---|---|---|
| 1 · Negatives | brings the picture out of the orange film strip | Negative to Positive converter | converts, does not repair — scratches and dust stay visible |
| 2 · Digitising | gets prints and negatives into the computer | a flatbed scanner or your phone | the result is never better than the scan or phone photo you start with |
| 3 · Scratches | fills scratches, dust specks and creases from the surrounding photo | Old Photo Scratch Remover | cannot rebuild a missing corner or a torn-away piece |
| 4 · Faded colour | measures the colour drift and slides it back | Faded Photo Color Restorer | does not colour black-and-white photos — that means inventing colour |
| 5 · The gift | turns the photo into a printable coloring page | Photo to Coloring Page | draws the true outline of the photo — it does not redraw it smoothly like an AI |
| 6 · Print size | sets the right pixels for framing or a photo lab | Image Resizer | enlarging adds pixels, not detail — a small original prints soft |
Not every photo needs every step. A negative goes through steps 1, 3, 4 and then 5 or 6; a print in reasonable condition may only need step 4.
How do I get the photos out of old negatives?
Photograph the negative against a bright, even white light — a window with thin clouds, or a phone or tablet showing a plain white page — or scan the strip on a flatbed at the highest resolution offered. Drop the file into the negative to positive converter.
What it does next is measured, and you can watch it happen: the tool reads the brightest points of the film in red, in green and in blue separately — those three numbers, shown in the stats line under the picture, are the orange mask. Each colour channel is pulled down by its own base level before inversion, so clear film becomes true black instead of blue. If the automatic reading misses, press “Pick the lightest spot” and click an unexposed film edge — the same trick a darkroom printer uses with a meter.
Two things worth knowing:
- Photographing through the back of the film mirrors the picture — tick “The picture is mirrored” to flip it back.
- A whole strip converts as a strip. To save one photo per frame, crop each frame first, then convert.
The whole box-to-print journey — what each path costs, which strips are worth keeping, and when throwing negatives away is honest — is walked in the guide What do you do with a box of old photo negatives?.
How do I digitise old prints — scanner or phone?
A flatbed scanner at its highest resolution is the better copy. A phone photo is honest and often good enough: hold the phone flat over the print, light it evenly from a window, no flash, and include the whole image area with no shadow across it.
Two traps that the restoration steps cannot undo:
- iPhone photos arrive as HEIC, and tools on this site read what your browser can decode — Safari opens HEIC, most other browsers do not. If a photo will not load, convert it to JPG first; the background is in why iPhone photos misbehave on Windows.
- A phone photo of an old print records today’s date and today’s GPS location, not the day the picture was taken. Worth knowing before the copies become the “when” of your family archive — see the data hiding in files.
How do I remove scratches, dust and creases?
Open the scan in the old photo scratch remover. It compares every pixel with what its surroundings would look like with narrow damage smoothed away — a dust speck or scratch line sits far out against that comparison, a real edge like a roofline or a profile survives unchanged, so it is not mistaken for damage. Marked pixels are then filled in from the nearest intact picture, ring by ring.
It works best across smooth areas — sky, walls, clothing — where the fill has clean surroundings to borrow from. On busy patterns such as foliage, brush carefully by hand and use Protect on anything that must stay untouched. A scratch crossing a face comes out soft, because the tool fills rather than reconstructs: whatever was under a deep scratch is gone, and no honest software brings it back. A missing corner needs a professional restorer or an AI service — and both will ask you to upload the photo.
How do I bring back faded colour?
This is the step that changes a 1975 print most. Colour prints use three dye layers that age at different speeds; the cyan layer usually fades first, which shifts the whole picture toward orange and turns the blacks muddy brown. The faded photo color restorer reads how dark the darkest points are in red, green and blue separately, slides each colour back to its proper range, returns true blacks, and lifts the washed-out tone — one click, with a Before/After slider to check.
Its honest limit: it restores colour that exists. A black-and-white photo stays black-and-white (a yellowed scan does come out clean and neutral — that is the old cast leaving, not colour arriving). Adding colour to a monochrome photo means inventing it, which takes an AI service and your photo on their server.
Scratches and colour are independent injuries — fix them in either order. A photo from a shoebox usually needs both.
How do I turn a restored photo into a gift?
Once the photo is clean again, turn it into a coloring page: the tool finds the real edges in the photo — classic edge detection, not a redrawn guess — and prints them as black outlines on white, sized for A4 or Letter, with room for a title like “For Grandma”. Grandchildren colour grandma’s own wedding. If you want many pages in one file, the site’s Coloring Book Pack turns up to 20 photos into a single print-ready PDF book with a cover and page numbers — €7 once, and the single pages stay free and unlimited.
The quieter gift is simply printing the restored photo properly — which is a matter of pixels.
What size should I print at, for framing?
| Print size | Pixels at 300 DPI | Enough for |
|---|---|---|
| 4 × 6 in (10 × 15 cm) | 1200 × 1800 | photo albums, frames on a shelf |
| 5 × 7 in (13 × 18 cm) | 1500 × 2100 | desk frames, small gifts |
| 8 × 10 in (20 × 25 cm) | 2400 × 3000 | wall frames |
| A4 (210 × 297 mm) | 2480 × 3508 | full-sheet prints, coloring pages |
| US Letter (8.5 × 11 in) | 2550 × 3300 | full-sheet prints |
Computed September 2026 from the inch and millimetre dimensions — inches × 300, millimetres ÷ 25.4 × 300. The image resizer’s A4 preset sets 2480 × 3508 in one click; for the frame sizes use the width and height fields. At arm’s-length viewing, 150 DPI is enough and halves the numbers (A4: 1240 × 1754).
To read this table for your own photo instead, drop the restored file into the photo print size checker: it measures your photo’s pixels on your device and says, for every size, whether that print turns out sharp, good or soft — and how much of the picture a squarer frame such as an 8 × 10 crops away.
The honest caveat: these numbers are a container, not a quality. Enlarging an 800-pixel photo to 2480 × 3508 produces a file with the right pixel count and no new detail — it will print soft. Scan the original as large as you can instead of resizing up.
What can these tools not do?
Stated plainly, because the rest of the internet will not:
- They do not invent detail. Whatever a scratch, a tear or sixty years of fading destroyed is gone; these tools make the damage stop being the first thing you see, they do not reconstruct what was under it.
- They do not add or remove people. Editing someone out of a photo, or a person who was never there into it, is generated content — the AI-editing genre. It runs on servers, and it is not what runs here.
- They do not colour black-and-white photos, and they do not sharpen beyond what the scan captured.
That restraint is the trade that buys the rest: a tool that only moves information already in the photo can run entirely in your browser, and the only copies of moments that exist nowhere else never have to leave your house.