A photo ornament ball is the year, folded: twelve photos, one for each month, on the twelve faces of a paper ball that hangs on the tree. The shape is a dodecahedron, twelve pentagons that close into something round enough to read as a bauble. This tool prints the whole thing on one sheet: your photos already sitting in their faces and turned so they stand upright once the ball hangs, the month on each, a cut outline, dashed fold lines and the glue tabs.
What you need
- One sheet of A4 or US Letter paper. Card of 160 to 200 gsm keeps the faces flat; office paper works too.
- Scissors for the solid outline. Small scissors help around the tabs.
- Glue: a glue stick or thin craft glue for the tabs.
- Ribbon or thread, about 20 cm, and a needle or a pin to make the hole.
How big is the ball?
| Face edge | The ball is | The printed template is | Fits |
|---|---|---|---|
| 22 mm | 4.9 cm across | 133 × 169 mm | A4 and US Letter |
| 25 mm | 5.6 cm across | 151 × 192 mm | A4 and US Letter |
| 28 mm | 6.2 cm across | 169 × 215 mm | A4 and US Letter |
Computed from the tool’s layout (November 2026). “Across” is face to face, what a ruler reads when the ball sits on the table. The small one suits a little tree or a gift tag on a present; the big one gives the photos the most room.
How to fold it
- Print at 100 percent: in the print dialog choose “actual size”, never “fit to page”, or the tabs will not meet.
- Cut the solid outline, around the whole template in one piece. The twelve faces stay joined.
- Crease every dashed line: the lines between the faces and the base of every gray tab. Folds made against a ruler come out straight.
- Fold each half into a bowl. The template is two flowers of six faces, January in the middle of one and December in the middle of the other. Glue the gray tabs of each flower under the edges they meet, photos facing out.
- Thread the ribbon before the two bowls close: poke a small hole through the middle of January, push the ribbon in from outside and knot it on the inside.
- Close the ball: fold the two bowls together and glue the last tabs. Hold it for a count of twenty.
Fewer than twelve photos is fine: the spare faces print in red and green with a small gold star. Untick the month names for a ball of photos alone, or change the year that sits on January.
The twelve faces fit more than a calendar year. A baby’s first year is the classic: one photo for each month from newborn to first birthday, a keepsake for the first Christmas after it. Twelve grandchildren fit on one ball for the grandparents’ tree, and so do twelve moments from a wedding year; untick the month names when the faces are not months.
What it costs
Nothing. No account, no watermark, no limit on how many you make. The photos never leave your device: the template is built in your browser and handed to your printer as a PDF, and closing the tab erases everything.
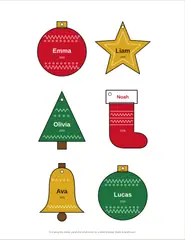
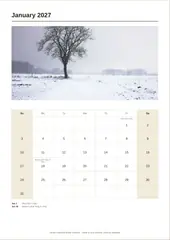
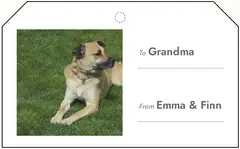
The same bench makes the rest of the year’s photo gifts: a photo cube of six pictures for the desk, a 2027 photo calendar with a photo over every month, gift tags with a photo inside and paper Christmas ornaments with a name on each. The whole shelf lives on the photo gifts page.
Questions
How do you make a photo ornament ball out of paper?
Build the template here: drop in up to twelve photos, January first, pick a size, download the PDF. Print it at 100 percent, cut the solid outline, crease every dashed line, fold each half into a bowl and glue the gray tabs under the edges they meet. Thread the ribbon through January before the two halves close.
How big is the finished ornament?
You pick the face size: 22, 25 or 28 mm along each edge, which makes a ball 4.9, 5.6 or 6.2 cm across. The printed template is 133 × 169 mm, 151 × 192 mm or 169 × 215 mm, and every size fits one A4 or US Letter sheet (computed from the tool's layout, November 2026).
Will the photos be the right way up on the ball?
Yes. Every photo is turned on the sheet so that it stands upright when the ball hangs from January, which is why the faces look tilted at odd angles on paper. The preview on the page is drawn from the same template, so what turns there is what hangs on the tree.
What if I have fewer than twelve photos?
The faces without a photo print in Christmas red and green with a small gold star, so the ball still looks finished. Photos fill the months in order, so six photos cover January to June and the other six faces print in color.
What paper and glue work best?
Card of 160 to 200 gsm, the kind craft shops sell as cardstock, holds the shape best; office paper works but the faces bow a little. A glue stick or a thin line of craft glue on the tabs is enough. Crease the folds against a ruler before you start gluing.
Are my photos uploaded anywhere?
No. The template is built in your browser and handed to your printer as a PDF; the photos never leave your device, and closing the tab erases them.