On this page
A photo banner is the one party decoration nobody else at the party will have: your photos, printed as flags, with the birthday person’s name spelled out between them. The craft blogs that rank for it walk the same path — choose photos, print them small, cut, punch holes, thread string — and each of them stops right where the arithmetic starts: how many sheets, how long the string, where each flag goes.
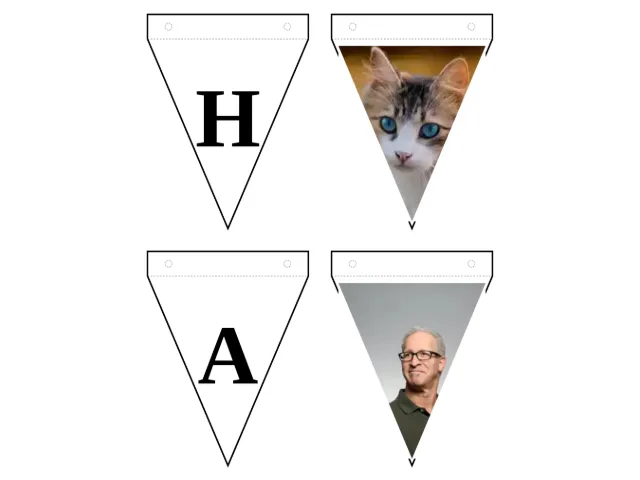
The maker below does the whole job in one place. Add your photos, type the name, and it lays out true-size flag sheets — A4 or US Letter, four flags per sheet, cut outlines, a dashed fold line over the string, punch marks — and computes the string length for your exact banner. Everything happens in your browser; the photos never leave your device.
How does a photo banner go together?
Three moves, the same three in every tutorial that ranks:
- Print the flags — your photos cover-cropped into flag shapes, each letter of the text on its own flag, a space a blank flag that marks the word gap.
- Cut along the solid outlines; scissors are fine, a trimmer is faster on a six-sheet banner.
- String them — fold each flag’s top tab back over the string along the dashed line and fix it with tape or a staple, or punch the two small circles in the tab and thread the string through both holes.
The craft blogs use 4 × 4 or 3.5 × 3.5 in prints matted on cardstock (persnicketyprints, simply2moms), or 3 × 4 school prints on a tag maker (downredbuddrive) — all read 2 October 2026. The maker here replaces the matting step: the photo is cropped into the flag itself, with a white frame so the scissors line never crosses a face.
What size should the photos be?
Any phone photo works — the crop takes the middle of the picture and fills the flag, so a face near the centre is what you want. If the important part of a wide group shot sits low, crop the photo first in any photo app, then add the cropped version.
The print sizes behind the tutorials: 4 × 4 in prints with holes punched 2.5 in apart (persnicketyprints, pub. 2013, read 2 October 2026), 3.5 × 3.5 in crops on 4 × 4 cardstock mats (simply2moms, pub. 2019, mod. 2024), 3 × 4 in school prints (downredbuddrive). On rectangle flags here the photo area is 84 × 100 mm — between the 3 × 4 and 4 × 4 print sizes, so nothing you are used to changes.
One tip worth taking from the 1st-birthday tutorial: when photos come from different years and different cameras, print them black and white — greyscale makes mismatched colours read as one set on purpose (thecraftedlife, pub. 2024, read 2 October 2026).
How many sheets will my banner print?
Computed from the maker’s layout — four flags per A4 or US Letter sheet, each flag 92 × 122 mm with a 14 mm fold-over tab (October 2026):
| Flags on the string | Sheets (A4 or Letter) | String to cut |
|---|---|---|
| 4 | 1 | about 0.8 m |
| 8 | 2 | about 1.2 m |
| 12 | 3 | about 1.7 m |
| 16 | 4 | about 2.2 m |
| 20 | 5 | about 2.7 m |
| 24 | 6 | about 3.2 m |
The flags come from your banner itself: every letter is one flag, every space is a blank flag, every photo is a photo flag. A 17-letter name (plus its space) with two photos is 20 flags — five sheets. The maker shows the count and the sheet count live as you type, and the PDF’s last sheet repeats them in print.
How much string or twine do I need?
The rule the maker computes and prints on its last sheet, in plain numbers: each flag takes 9.2 cm of string (its own width), leave 3 cm between flags, and add 15 cm at each end to tie. So 8 flags ≈ 1.2 m, 12 flags ≈ 1.7 m, 24 flags ≈ 3.2 m.
The hand-worked versions in the tutorials agree. Persnicketyprints budgets 5 in of twine per 4-in photo plus 6 in at each side — four photos want 32 in ≈ 81 cm by their rule, and 76 cm by ours; the two rules land within 5 cm of each other (both read 2 October 2026). Simply2moms strings 4-in photo mats at a 5-in pitch — 24 mats fill a 120-in (3 m) wall — using clothespins on ribbon between Command hooks.
Ribbon, twine, yarn and parcel string all work. Thicker string fills the punched holes better; thin thread is happier taped.
How do I assemble the whole banner?
The consensus across the tutorials, with the maker’s shortcuts where they help:
- Paper: light card of 160–200 g/m² hangs best and keeps the flags’ shape; plain printer paper is fine for a test run or one evening.
- Print at 100 percent (“actual size”), never fit-to-page — fit-to-page shrinks every flag a little and the fold line stops marking the fold.
- Cut along the solid outlines — scissors for four flags, a trimmer for twenty-four.
- Attach: fold each flag’s tab back over the string and fix with tape or a staple, or punch the two marked circles and thread the string through both holes. The craft alternatives work on the same flags: clothespins on ribbon (simply2moms), or washi tape over the string at each flag (persnicketyprints).
- Space the flags about 3 cm apart as you go; the string length was computed for exactly that.
- Hang on Command hooks at both ends — damage-free, and the 15 cm spare at each end ties on cleanly.
For timing, the honest anchor is the supplies-list method: persnicketyprints calls its four-photo version a 10-minute banner (read 2 October 2026). Cutting and fixing is the whole of the work — a 24-flag birthday banner is 24 cuts and 24 folds, so budget a quiet half hour with the kettle on.
How do I hang it without damaging the wall?
Command hooks — the damage-free answer the graduation tutorial itself uses (simply2moms, read 2 October 2026). Two hooks, one at each end, the banner’s spare 15 cm ties onto them. Along a mantel or a shelf the string can sit directly on the edge. Washi tape holds light paper garlands on paint for an evening; it releases without residue, which is the whole point of choosing it.
Does one banner shape fit every occasion?
The flags carry no occasion — the photos do. Computed with the maker’s own layout math, October 2026:
| Occasion | Banner text | Photos | Flags | Sheets | String to cut |
|---|---|---|---|---|---|
| 1st birthday | LILY IS ONE | 12 — one from every month | 23 | 6 | about 3.1 m |
| Graduation | CONGRATS NOAH | 8 — school years in black and white | 21 | 6 | about 2.8 m |
| Anniversary | OUR 25 YEARS | 6 — the wedding then and now | 18 | 5 | about 2.5 m |
| Retirement | FAREWELL MEG | 12 — the years of service | 24 | 6 | about 3.2 m |
The maximalist version is its own thing: simply2moms’ graduation wall strings about 24 photo mats per 120-in row across four rows — a room, not a banner. The letter-flags-and-photos banner above is the one that fits over a table or a mantel.
What can this maker not do?
It takes 12 photos and 32 text flags at most — long greetings split across two banners look better than one crowded string. It does not print your photos at retail (the Walgreens photo-banner route is a different product for a different errand), and it prints flags, not photo cards — for cards with photos and typed to-from lines, the photo gift tags maker prints eight to a sheet, and the photo memory game turns the same camera roll into a game. Both share this bench’s rules: free, no account, nothing uploaded.
Every sheet count and string length above is computed from the photo bunting maker’s print layout and verified against its output on 2 October 2026. The craft methods, photo sizes, spacing rules and the 10-minute timing are the named tutorials’ own, each read the same day and linked with its publication date.
Questions
How many photos do I need for a birthday banner?
Between 3 and 12. The maker alternates letter flags and photo flags, so a short name plus six photos already reads as a banner: LILY IS ONE with 12 monthly photos is the 1st-birthday classic at 23 flags and six sheets. At the other end, three photos and a four-letter name is a lovely small garland.
What size should photos be for a banner?
The craft standard is 4 × 4, 3.5 × 3.5 or 3 × 4 in prints (persnicketyprints, simply2moms, read 2 October 2026). The maker here takes any phone photo and cover-crops it into the flag's photo area — 84 × 100 mm on rectangle flags — with a white frame so the cut line never crosses a face.
How do I hang a photo banner without damaging the wall?
Command hooks at both ends are the craft blogs' own damage-free answer (simply2moms, read 2 October 2026); washi tape works on paint for light garlands. The 15 cm of spare string at each end exists exactly for tying onto hooks.
Can I make a photo banner for free?
Yes — the maker on this page is free, needs no account, and puts your own photos (not stock art) into the flags. Every method on page one of the search results ends with buying prints or cutting by hand; none of them generates printable flag sheets from your photos.
How far apart should photo flags hang?
About 3 cm of string between flags — enough that each flag reads on its own, tight enough that the banner reads as one line. The maker computes the total string length from exactly this spacing and prints it on the last sheet.
Can I make a graduation banner with pictures?
Yes — school photos from different years are the classic graduation fill. Print them black and white so different cameras and decades match, and put CONGRATS plus the name in the letter flags: CONGRATS NOAH with eight photos is 21 flags, six sheets and about 2.8 m of string.